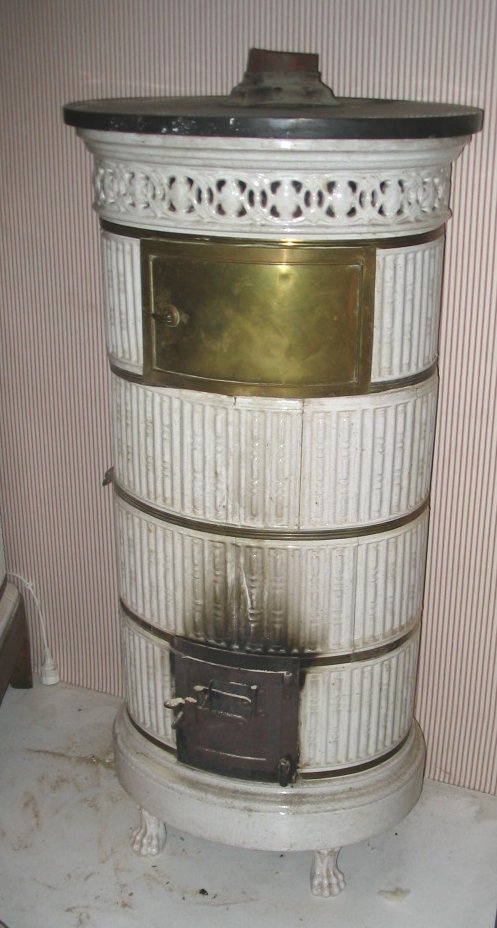
It was supposed to be a masonry stove. Being married to a Swiss I’ve spent quite some time in Swiss houses, old and new, that are heated by tiled or plastered masonry stoves.  In a tiny and ancient log cabin built by the cow-herds taking their cows to high pasture on the alps, a half-way overnight stop in a meadow in the forest, there was a small tiled stove with a bench to warm your bottom on. In a new house built by parents of our friends, a masonry stove bisected the space in the corner of two rooms and a corridor. Logs were loaded from a door in the corridor, burnt short and hot morning and night, and the heat circulated through a maze of masonry within the walls of the stove kept the house warm all day and night.
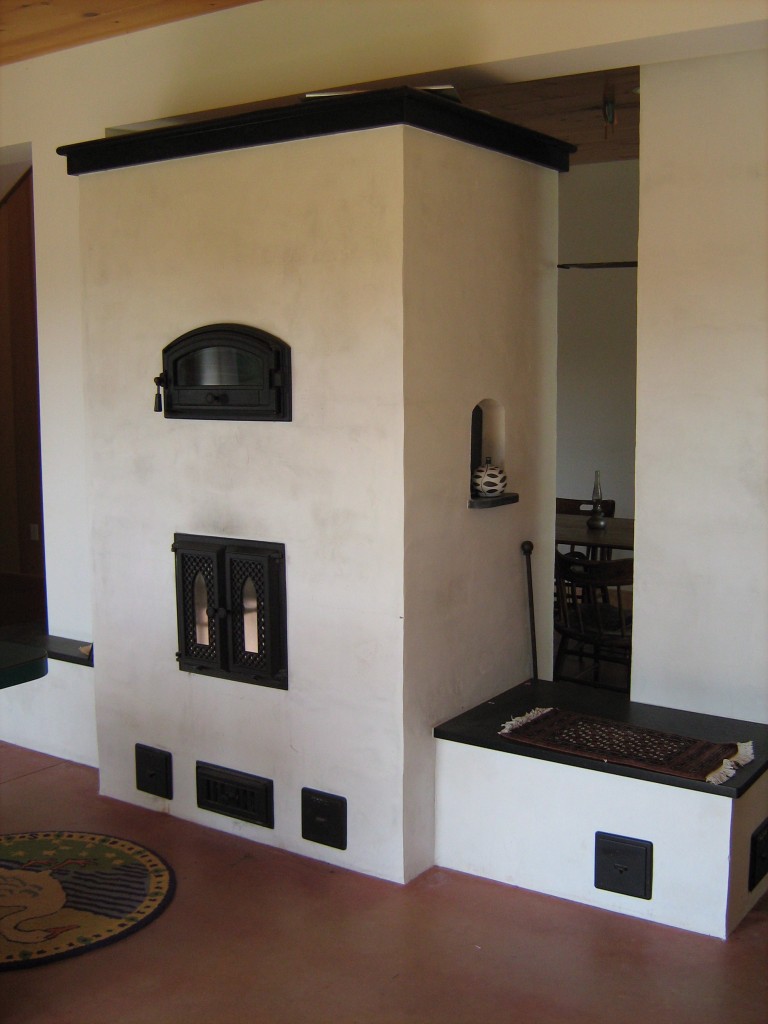
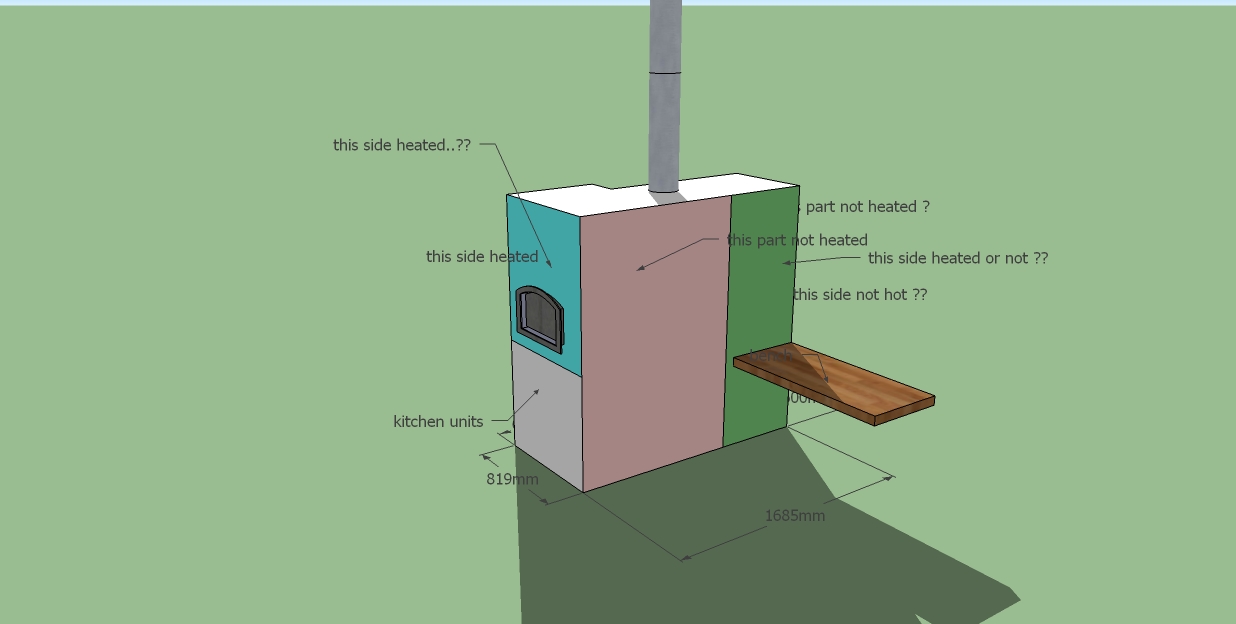
Wouldn’t it be lovely to have a masonry stove? A thermal mass in the middle of your home warming from the heart, somewhere warm to snuggle against? So we found a spot right in the middle of the house for the stove and I started on some research. Getting a masonry stove in the UK is evidently rather more challenging than in Switzerland where it is quite standard. I spoke to a couple of people who make stoves, but getting plans for something that would be likely to make it through building control seemed a distant prospect. The process of building control already seemed to be dragging on practically for ever, with waiting for Scotframe to get back to us. I decided to just put in for building control with a basic stand-alone stove made of soapstone so we could at least get started on the building. Then I started looking at alternatives that would give us a stove set into the wall.
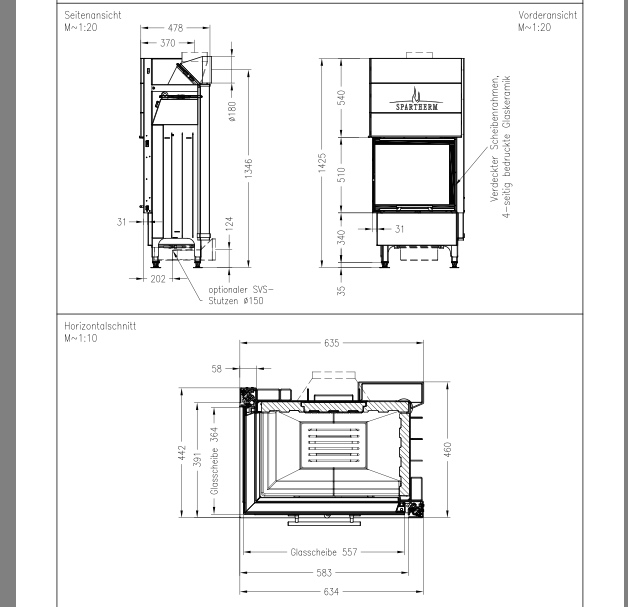
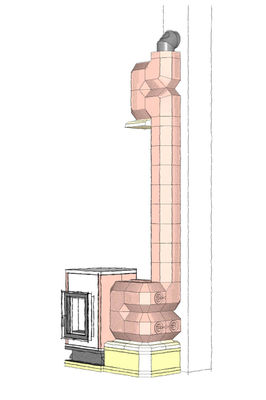
I started looking at stoves. An issue was that the space allocated to the stove was quite restrictive and I needed to find a stove that was relatively slim and also and also had the possibility of the flue coming out of the side, so we could keep the flue run going through the cupboard in the upstairs bathroom which had been allocated to it.

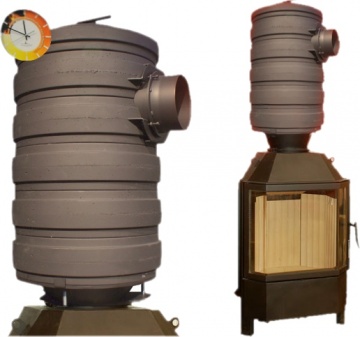
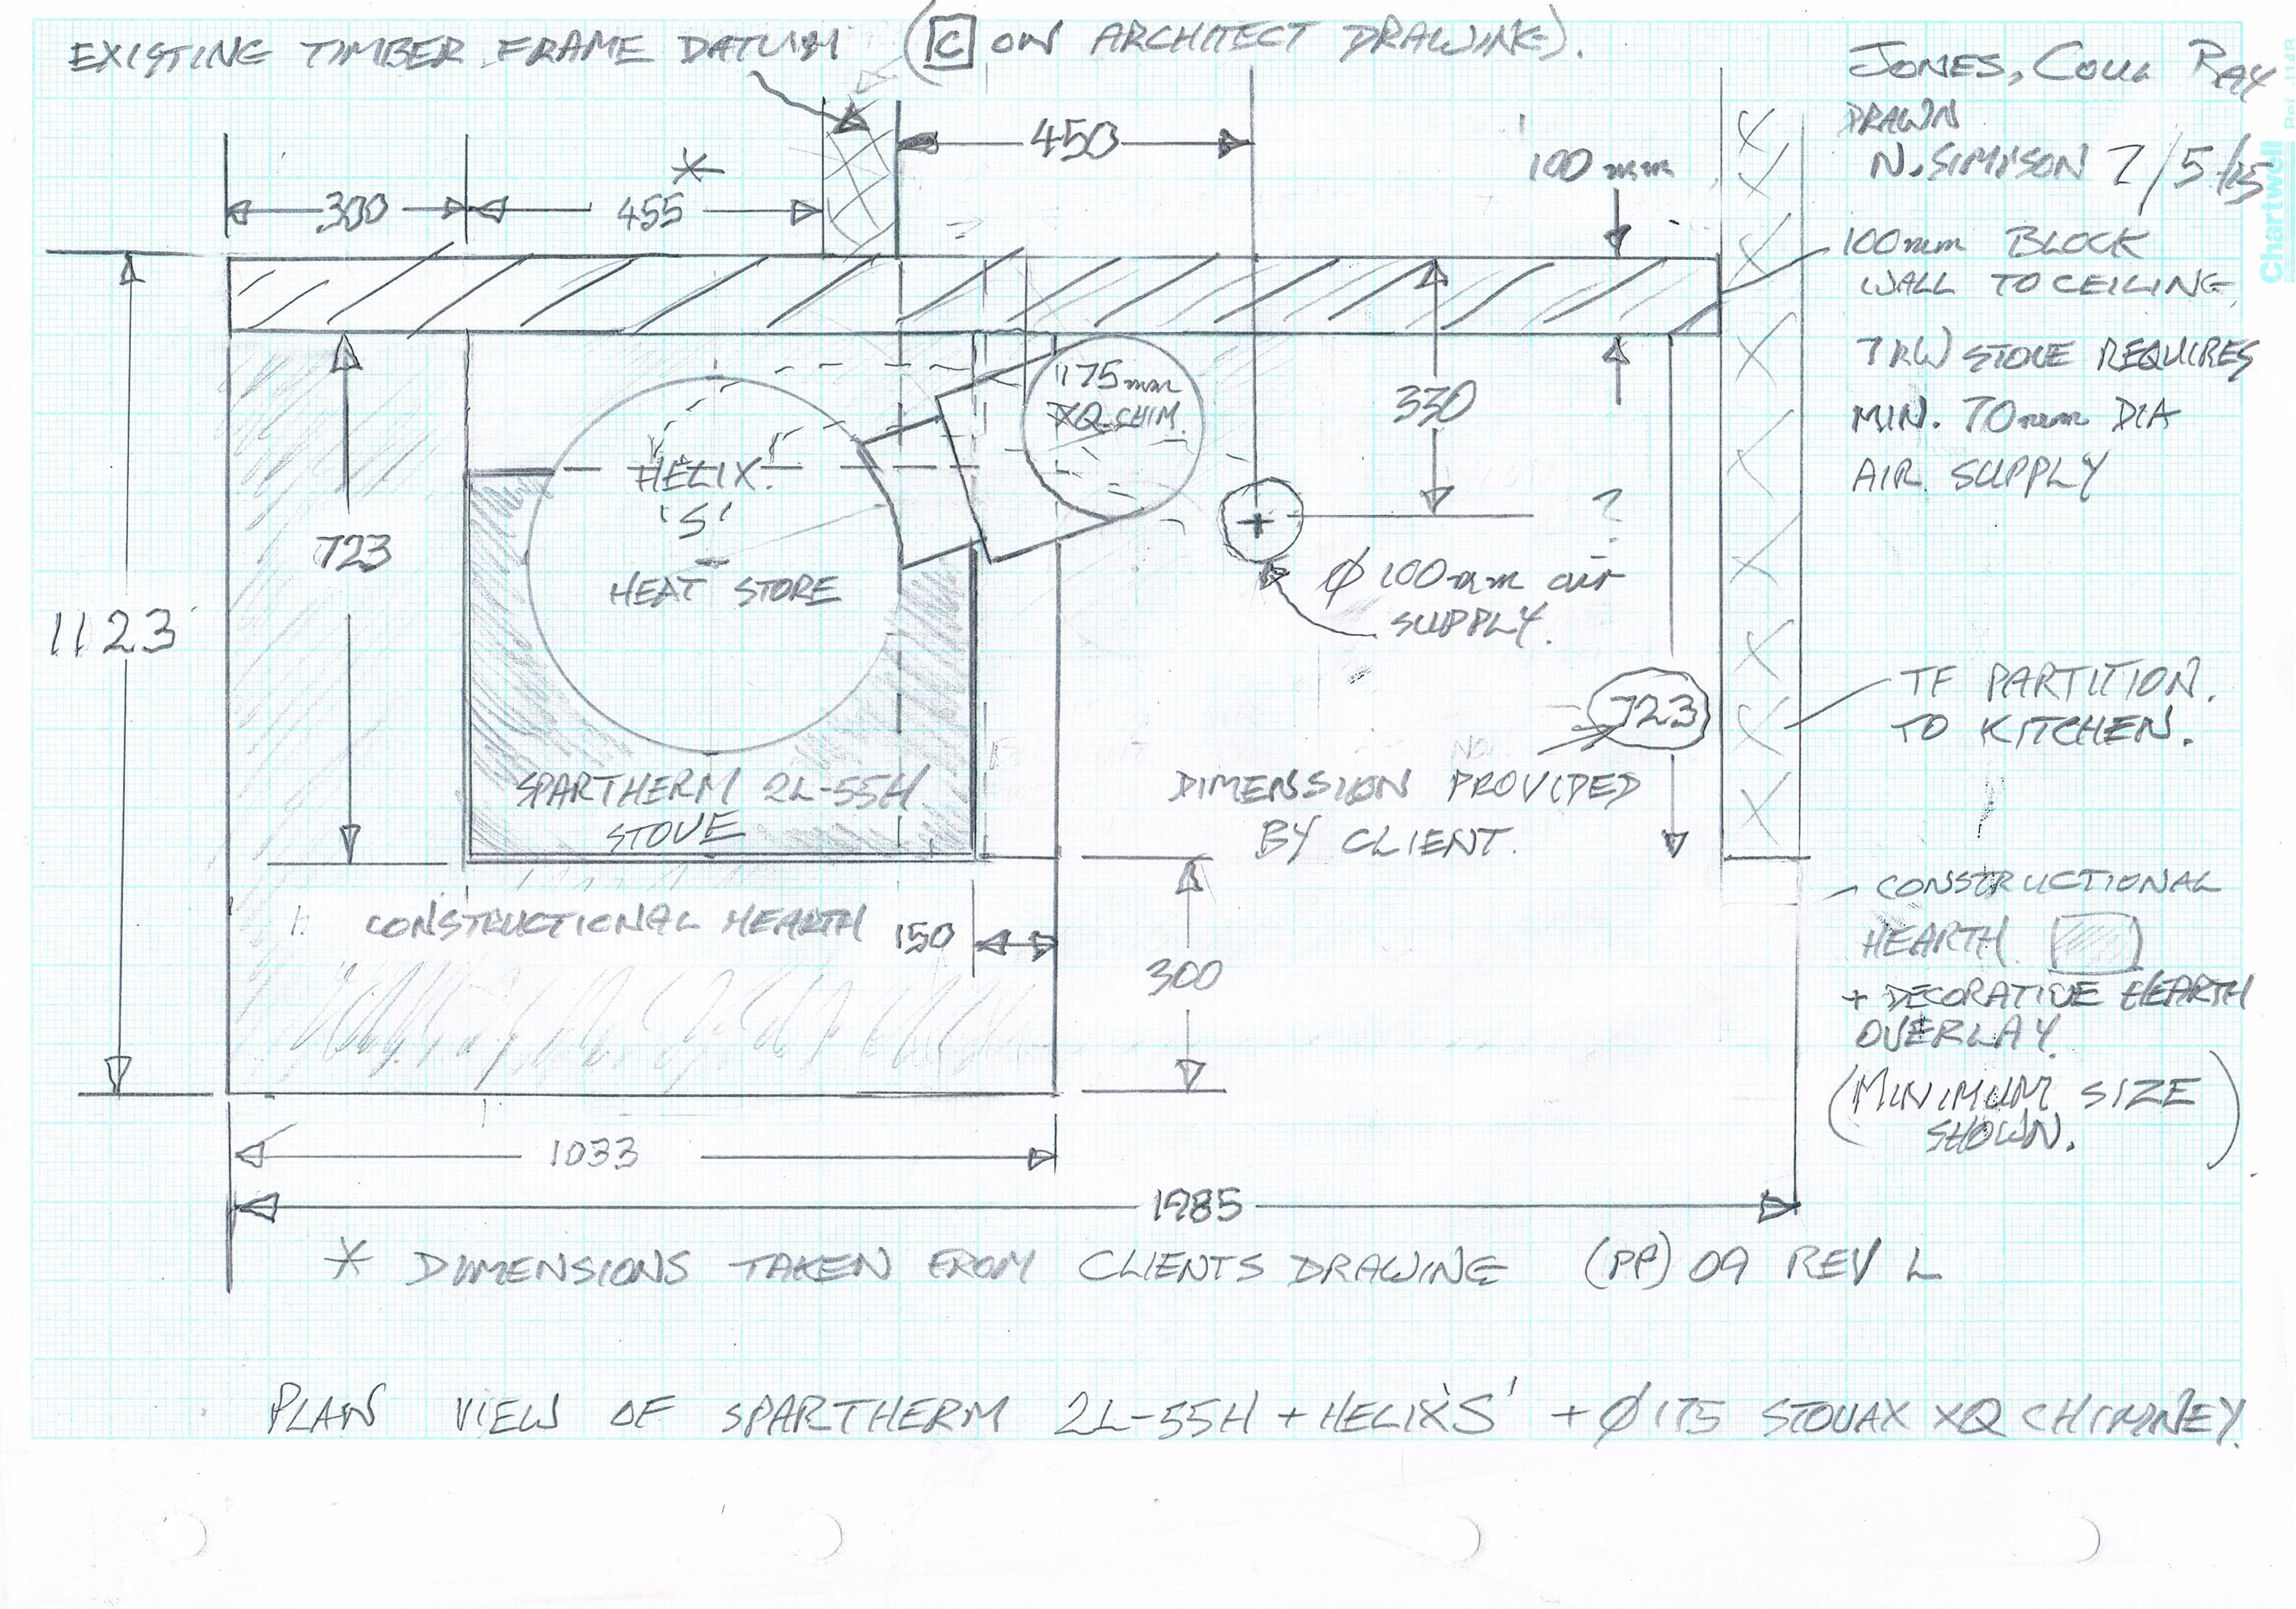
It was a bit of an ask but I discovered Spartherm stoves were what I was looking for as they had a heat storage device called a Helix, for taking heat out of the hot flue gasses and storing it. This also meant that the flue could come out of the side of the helix so it would fit into the space allocated for it. I started with a local stove company, The Scottish Stove Company in Croftamie. I needed help on working out the constructional hearth and distances between the stove and the flue as my head was just about popping off with all the complicated guidance and figures. Trying to find out the distance between the centre of the stove and the centre of the flue when attached to the helix was a feat of determination. The distances weren’t on the technical documents for the stove or the helix and, even when I called up the company in Germany (nearly having to enlist the husband to speak German) they couldn’t locate the measurement I was looking for.
 So despite me calling the Scottish Stove Company numerous times and popping in a couple, they weren’t really able to answer my questions so I shifted to Kinross Stove company who had the option of an engineer to come out to site which was helpful. I was, by now, at the stage of the build where I had gone from trusting, unquestioning ‘they are all professionals and know what they are doing’ to a position of blossoming control freakery. When I received the diagram from the stove engineer I sent it back twice due to mistakes (firstly a misprint in one of the measurements, and secondly because the sketch assumed we would have the superimposed and the constructional hearth the same sizes, when I had asked for the minimum size of each). I then discovered, when getting Jamie the MVHR fitter to move his pipework slightly to make way for the stove flue, that the stove engineer hadn’t allowed for one of the rafters in the roof SIP panels that was square in the way of the flue run. The flue needed to be at least 50mm from this rafter.

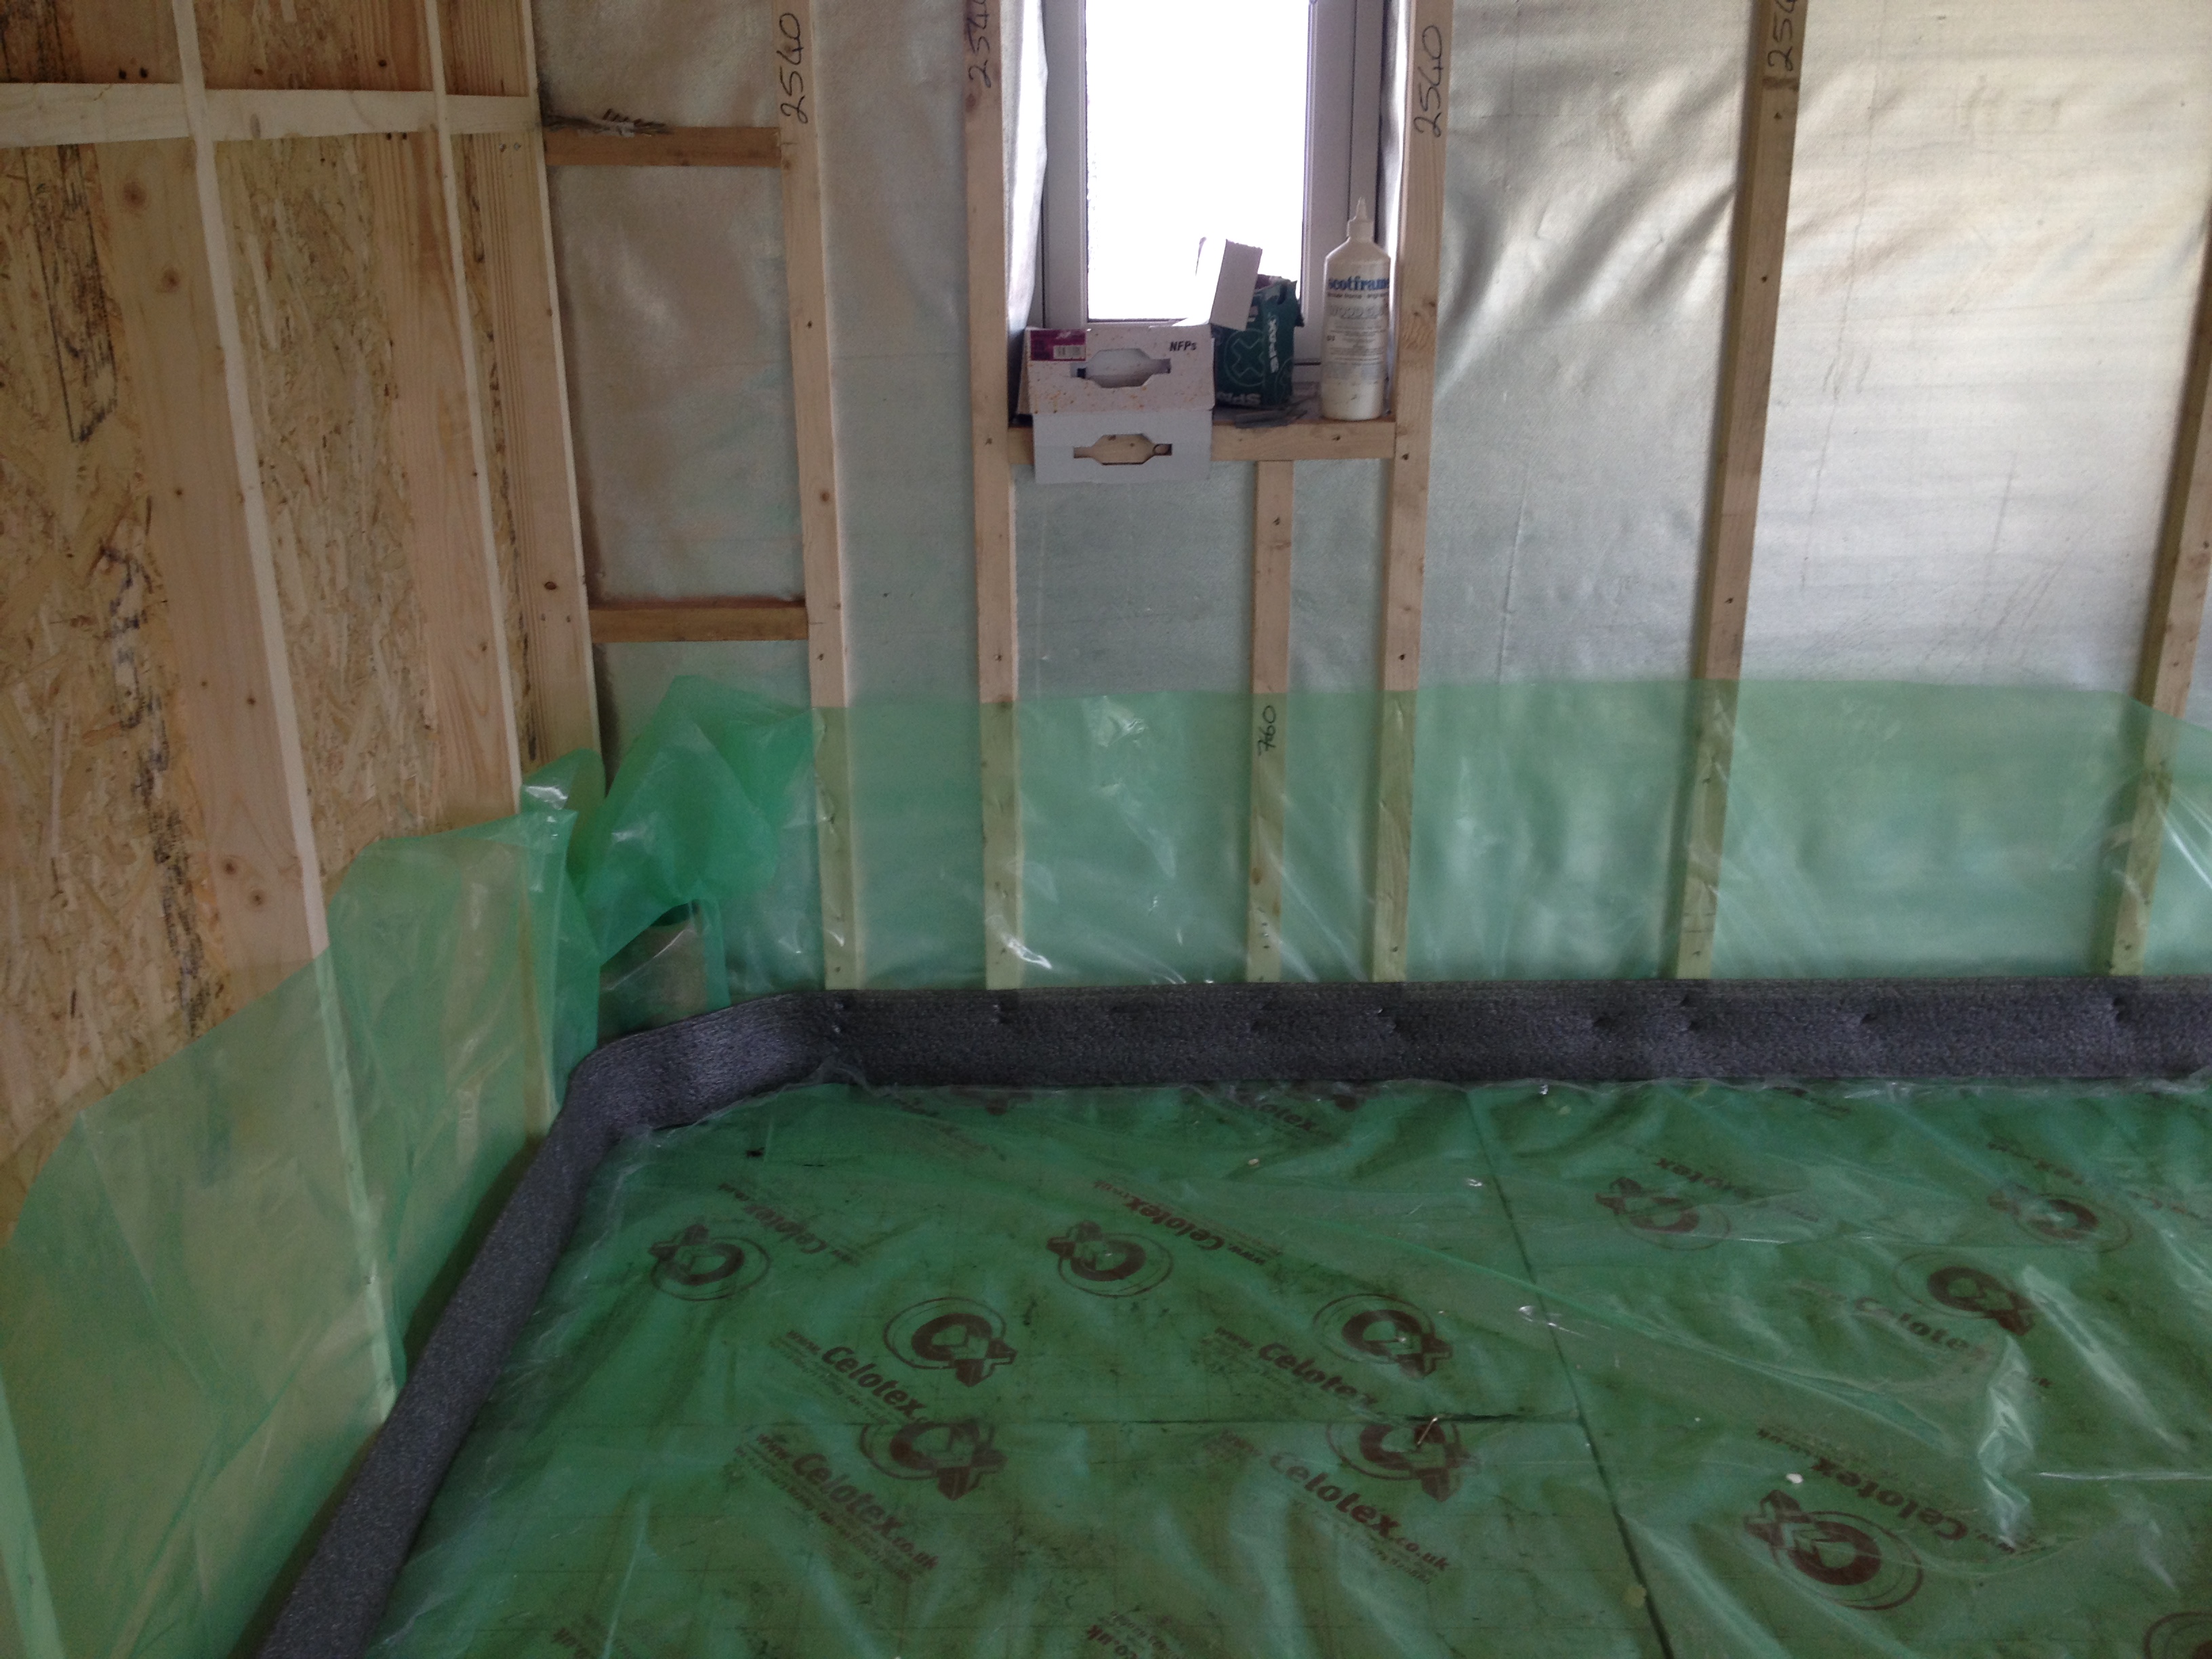
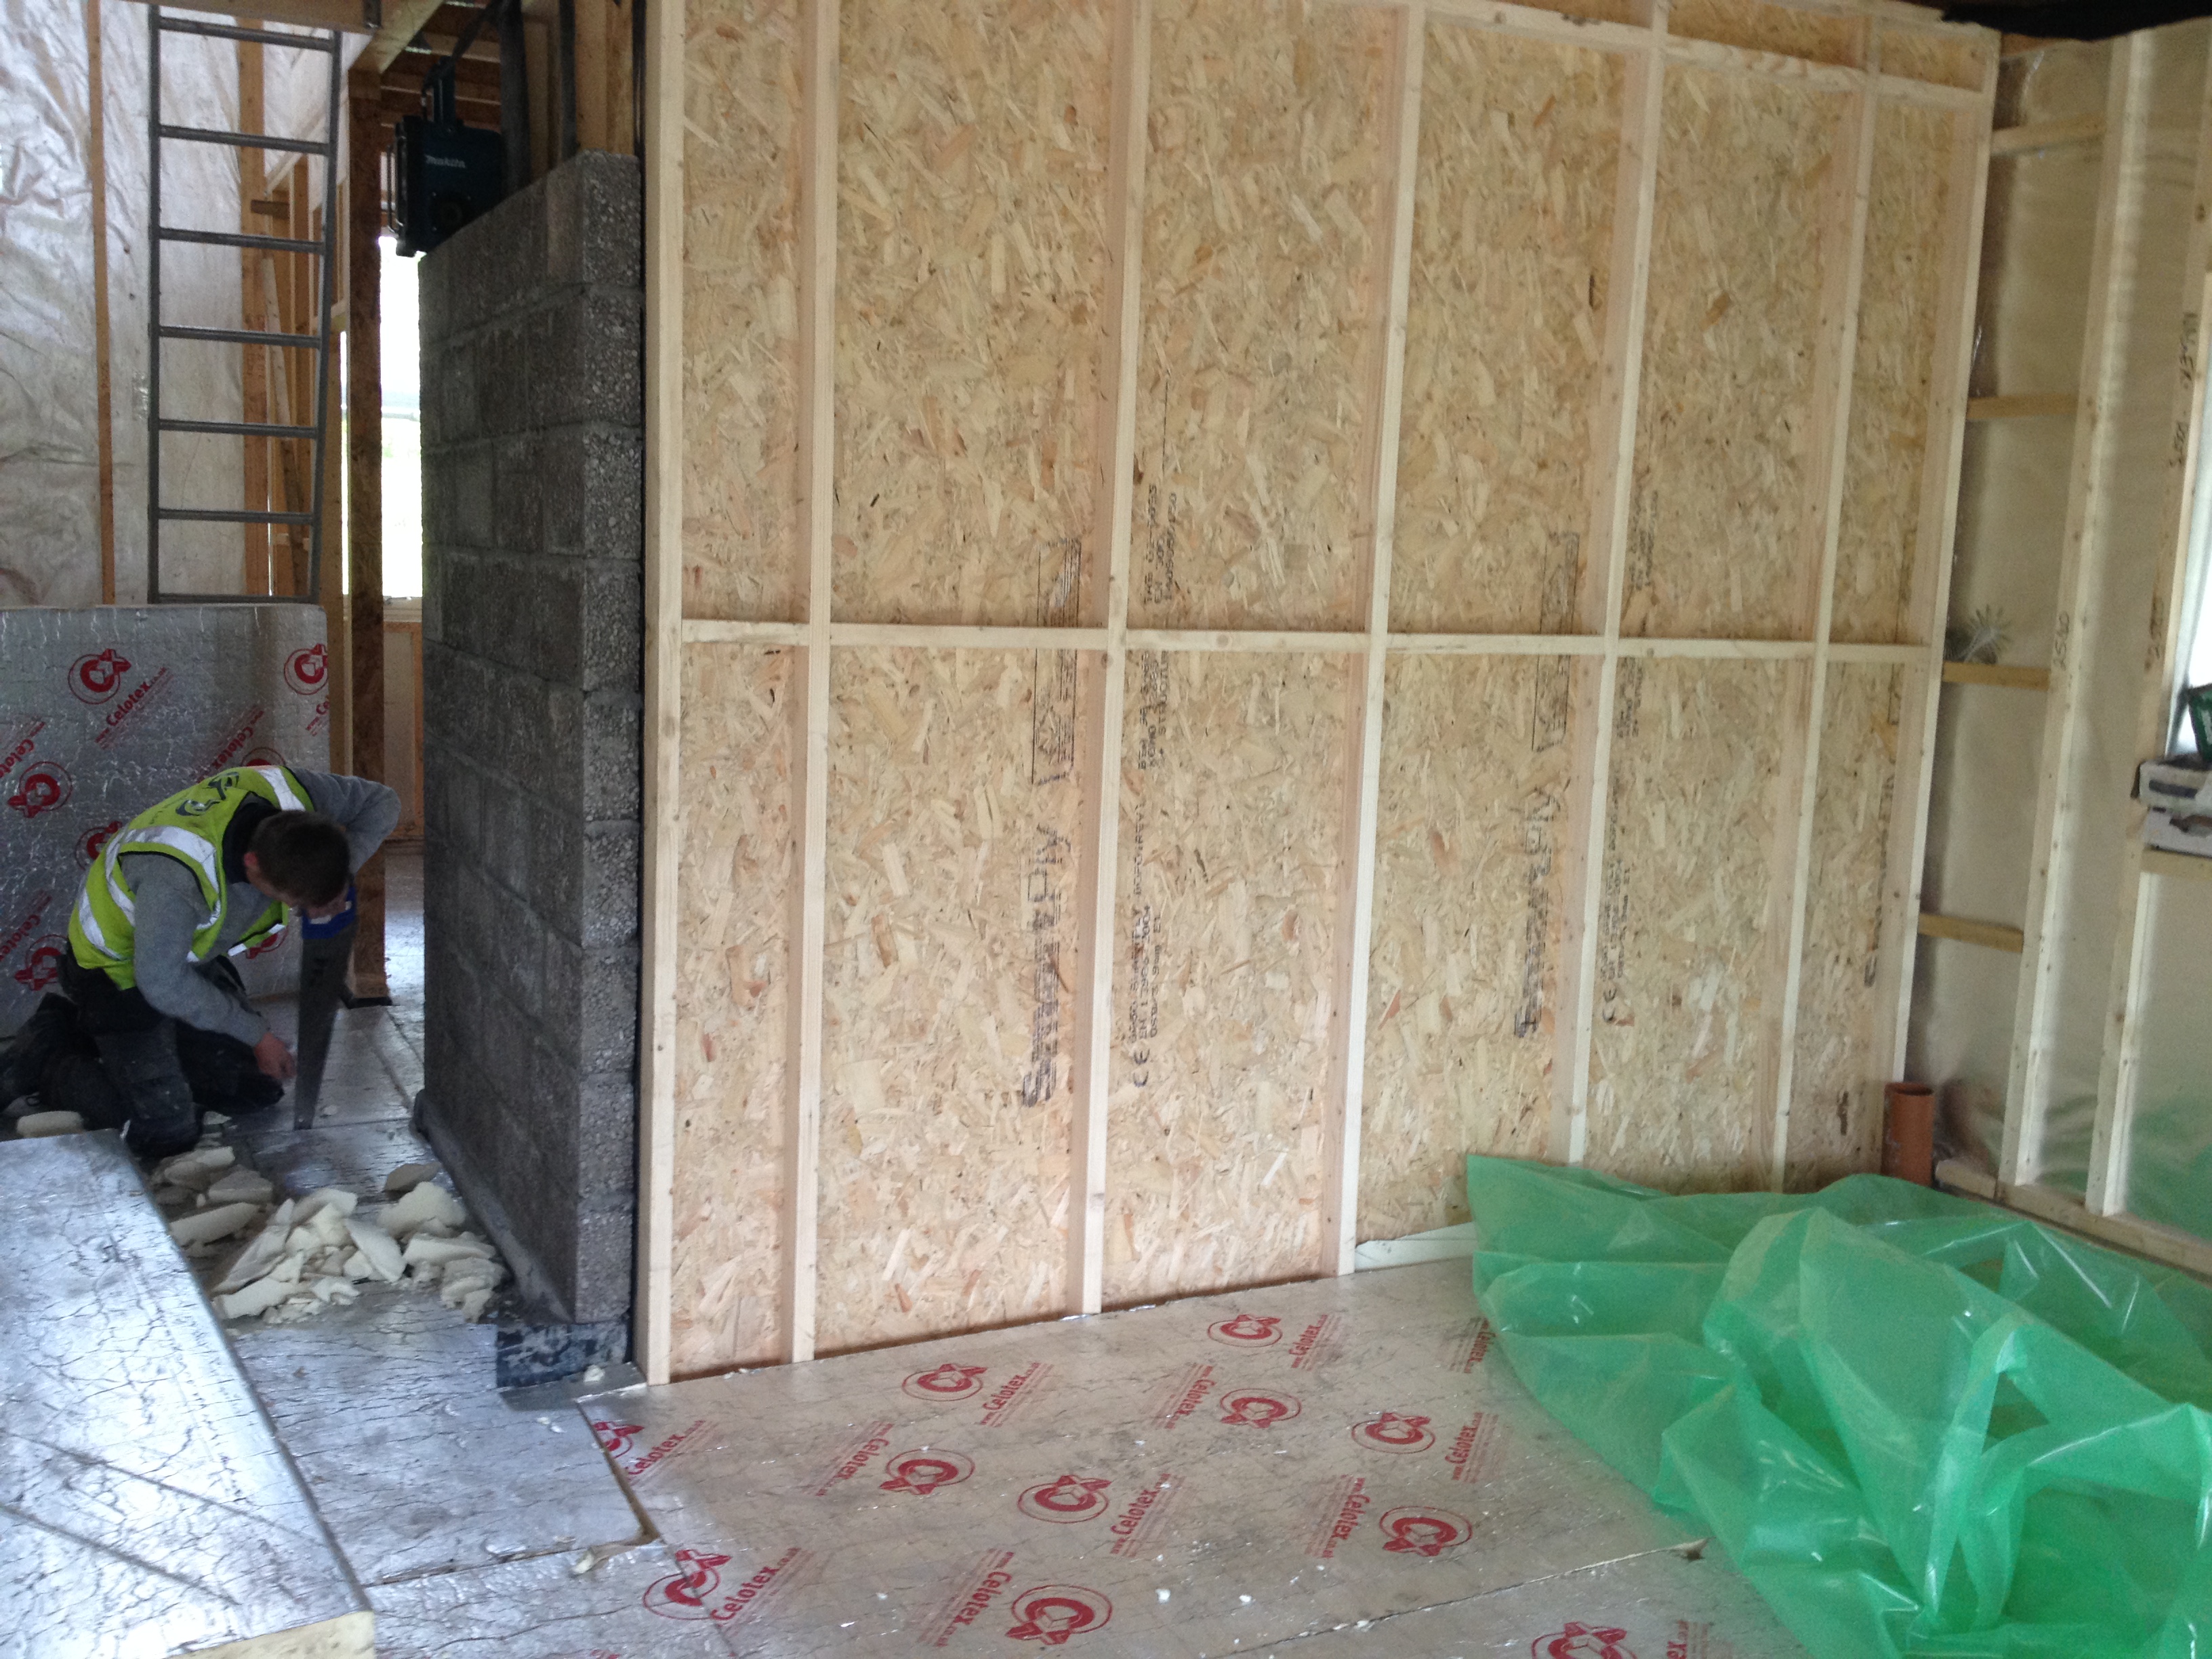
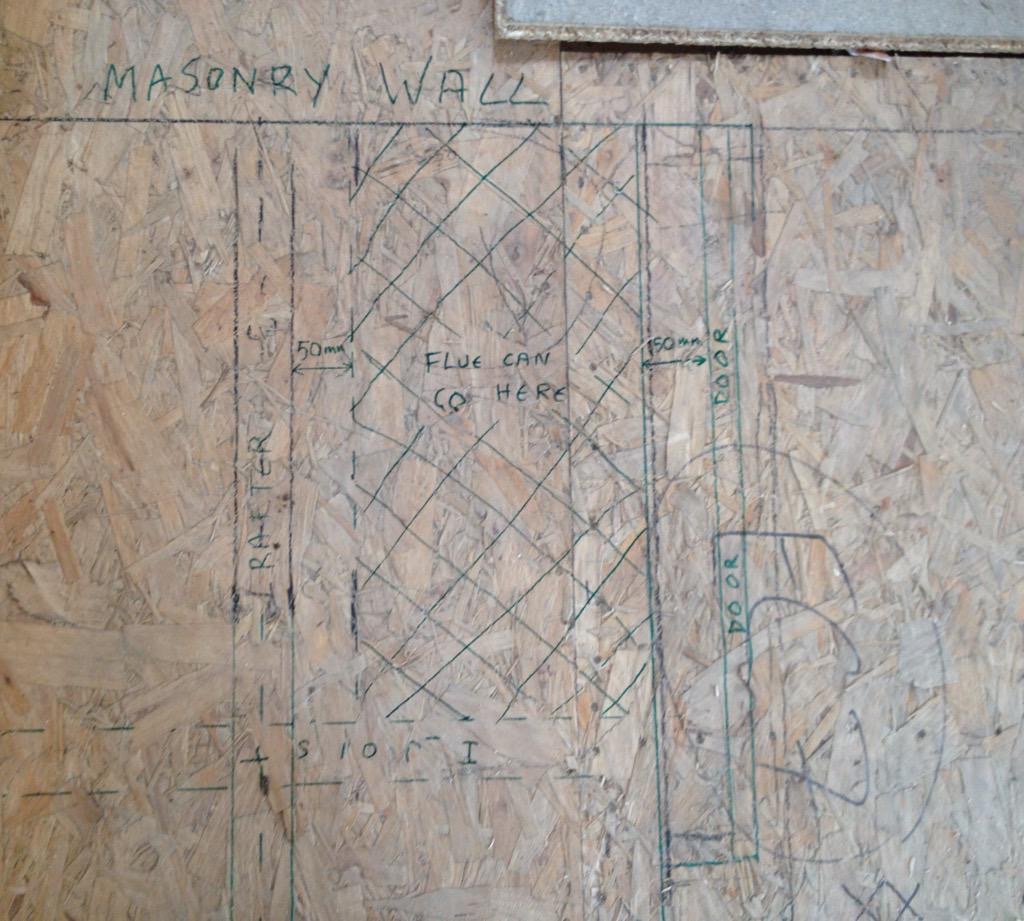
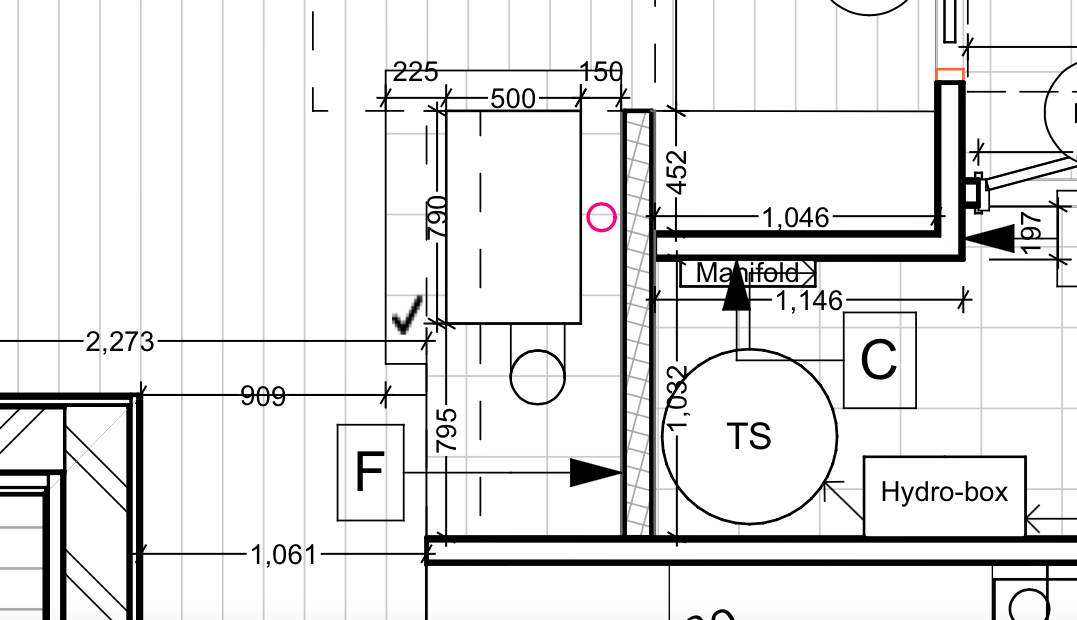
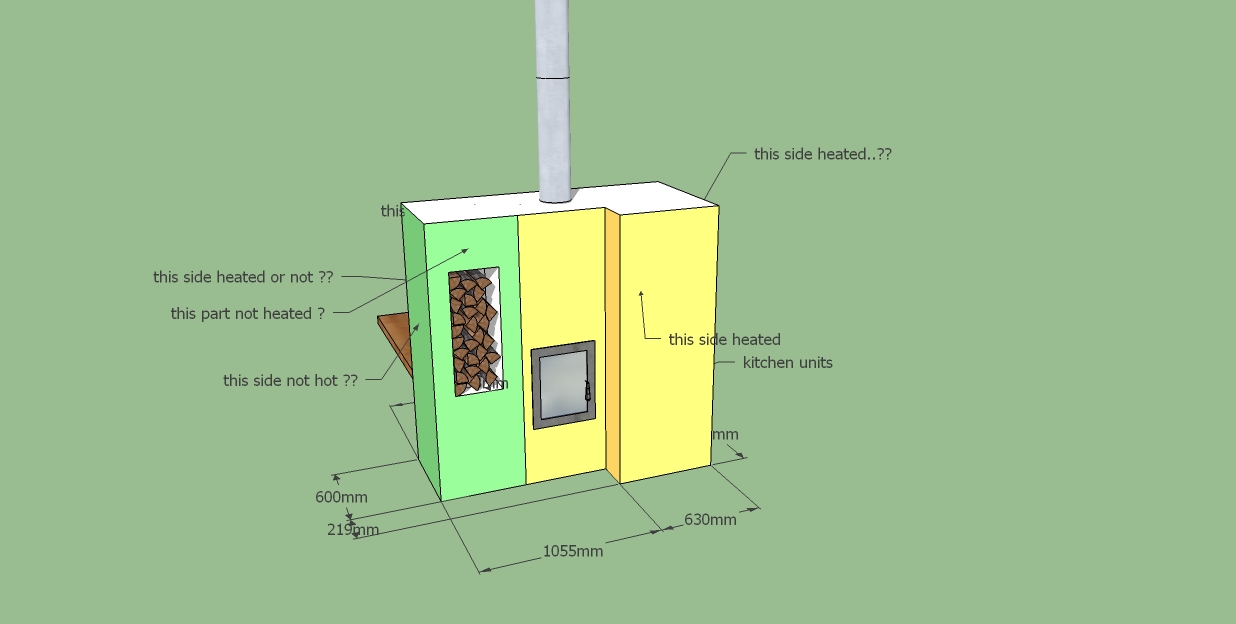
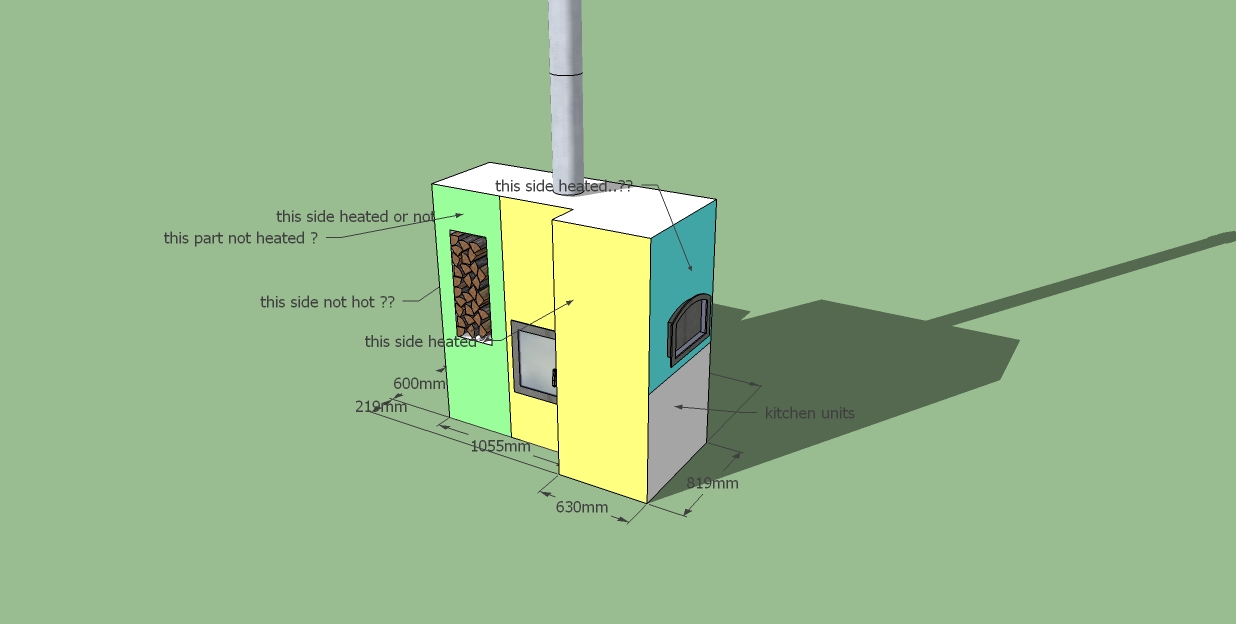
Jamie and I spent a while marking out on the floor the various constraints on where the flue could go: Masonry wall at back, joist at front, rafter in roof to north and extent of cupboard containing the flue to the south. It left a tolerance of 20mm at each side of the flue for where it could go. I went back to the stove technical details, it seemed that it would fit, but I wouldn’t be sure until the stove arrived.

Marked out on the floor – the hatched area is the flexibility for the stove flue
And look! It miraculously fits
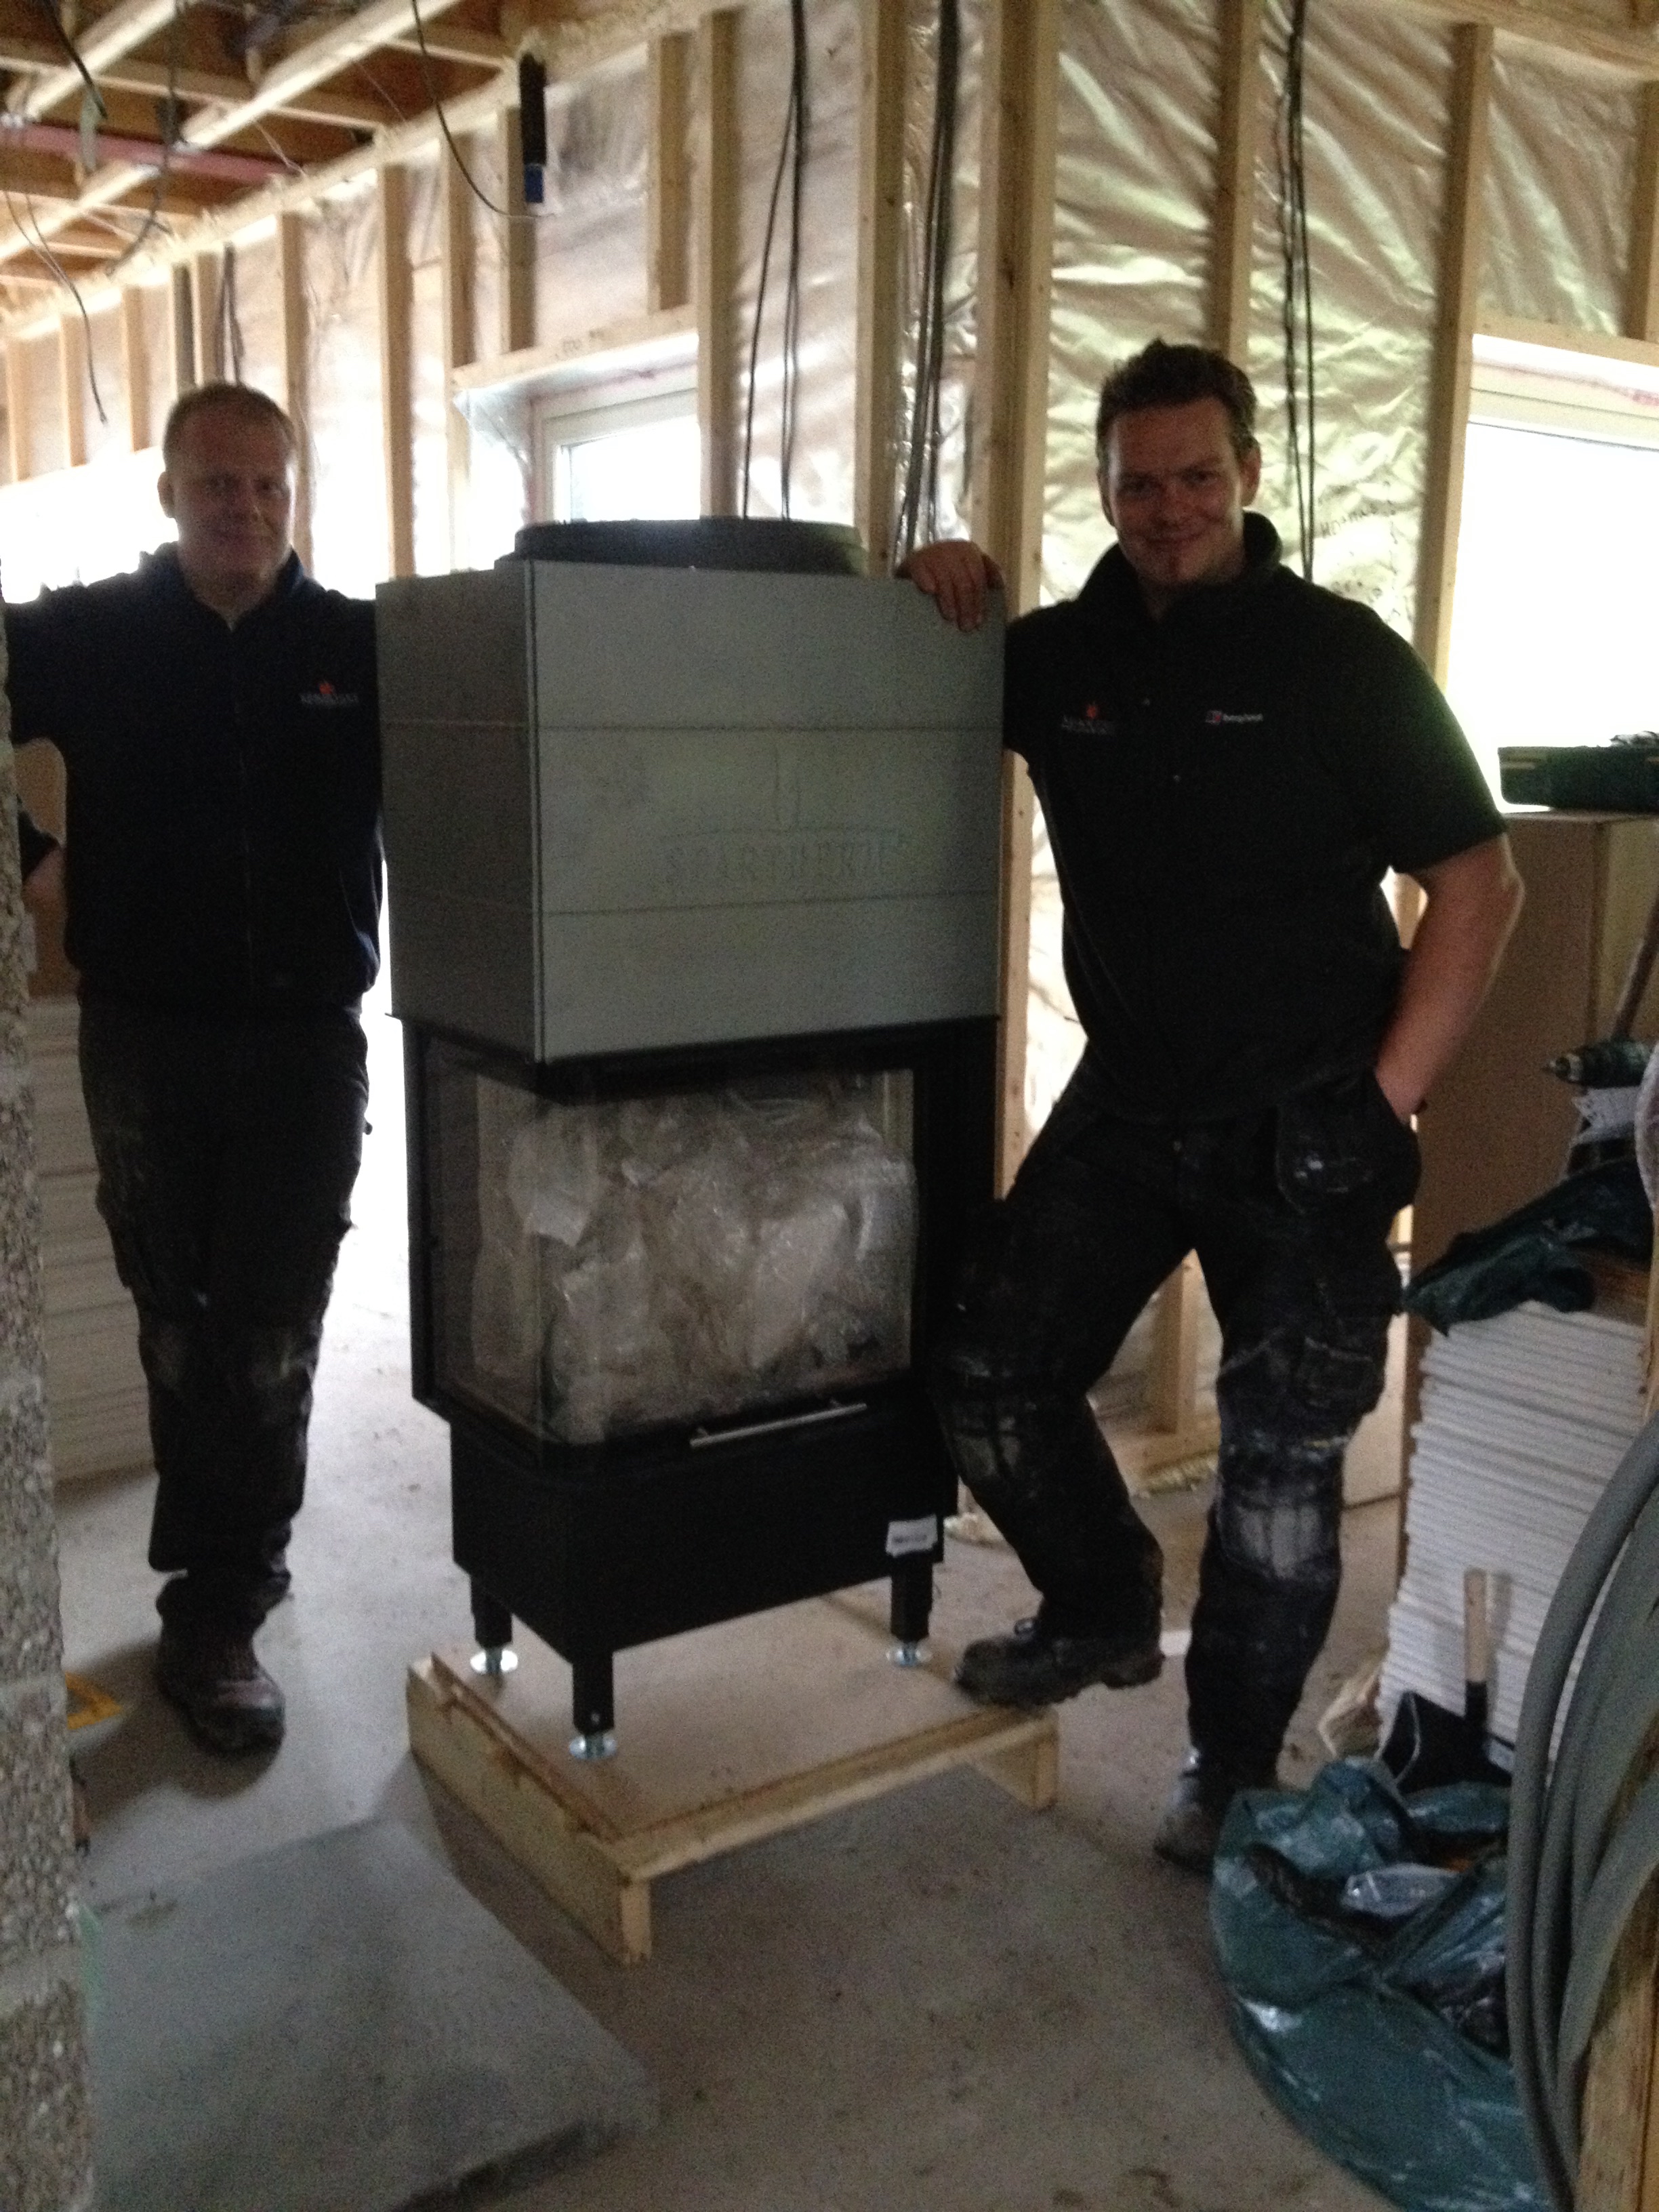
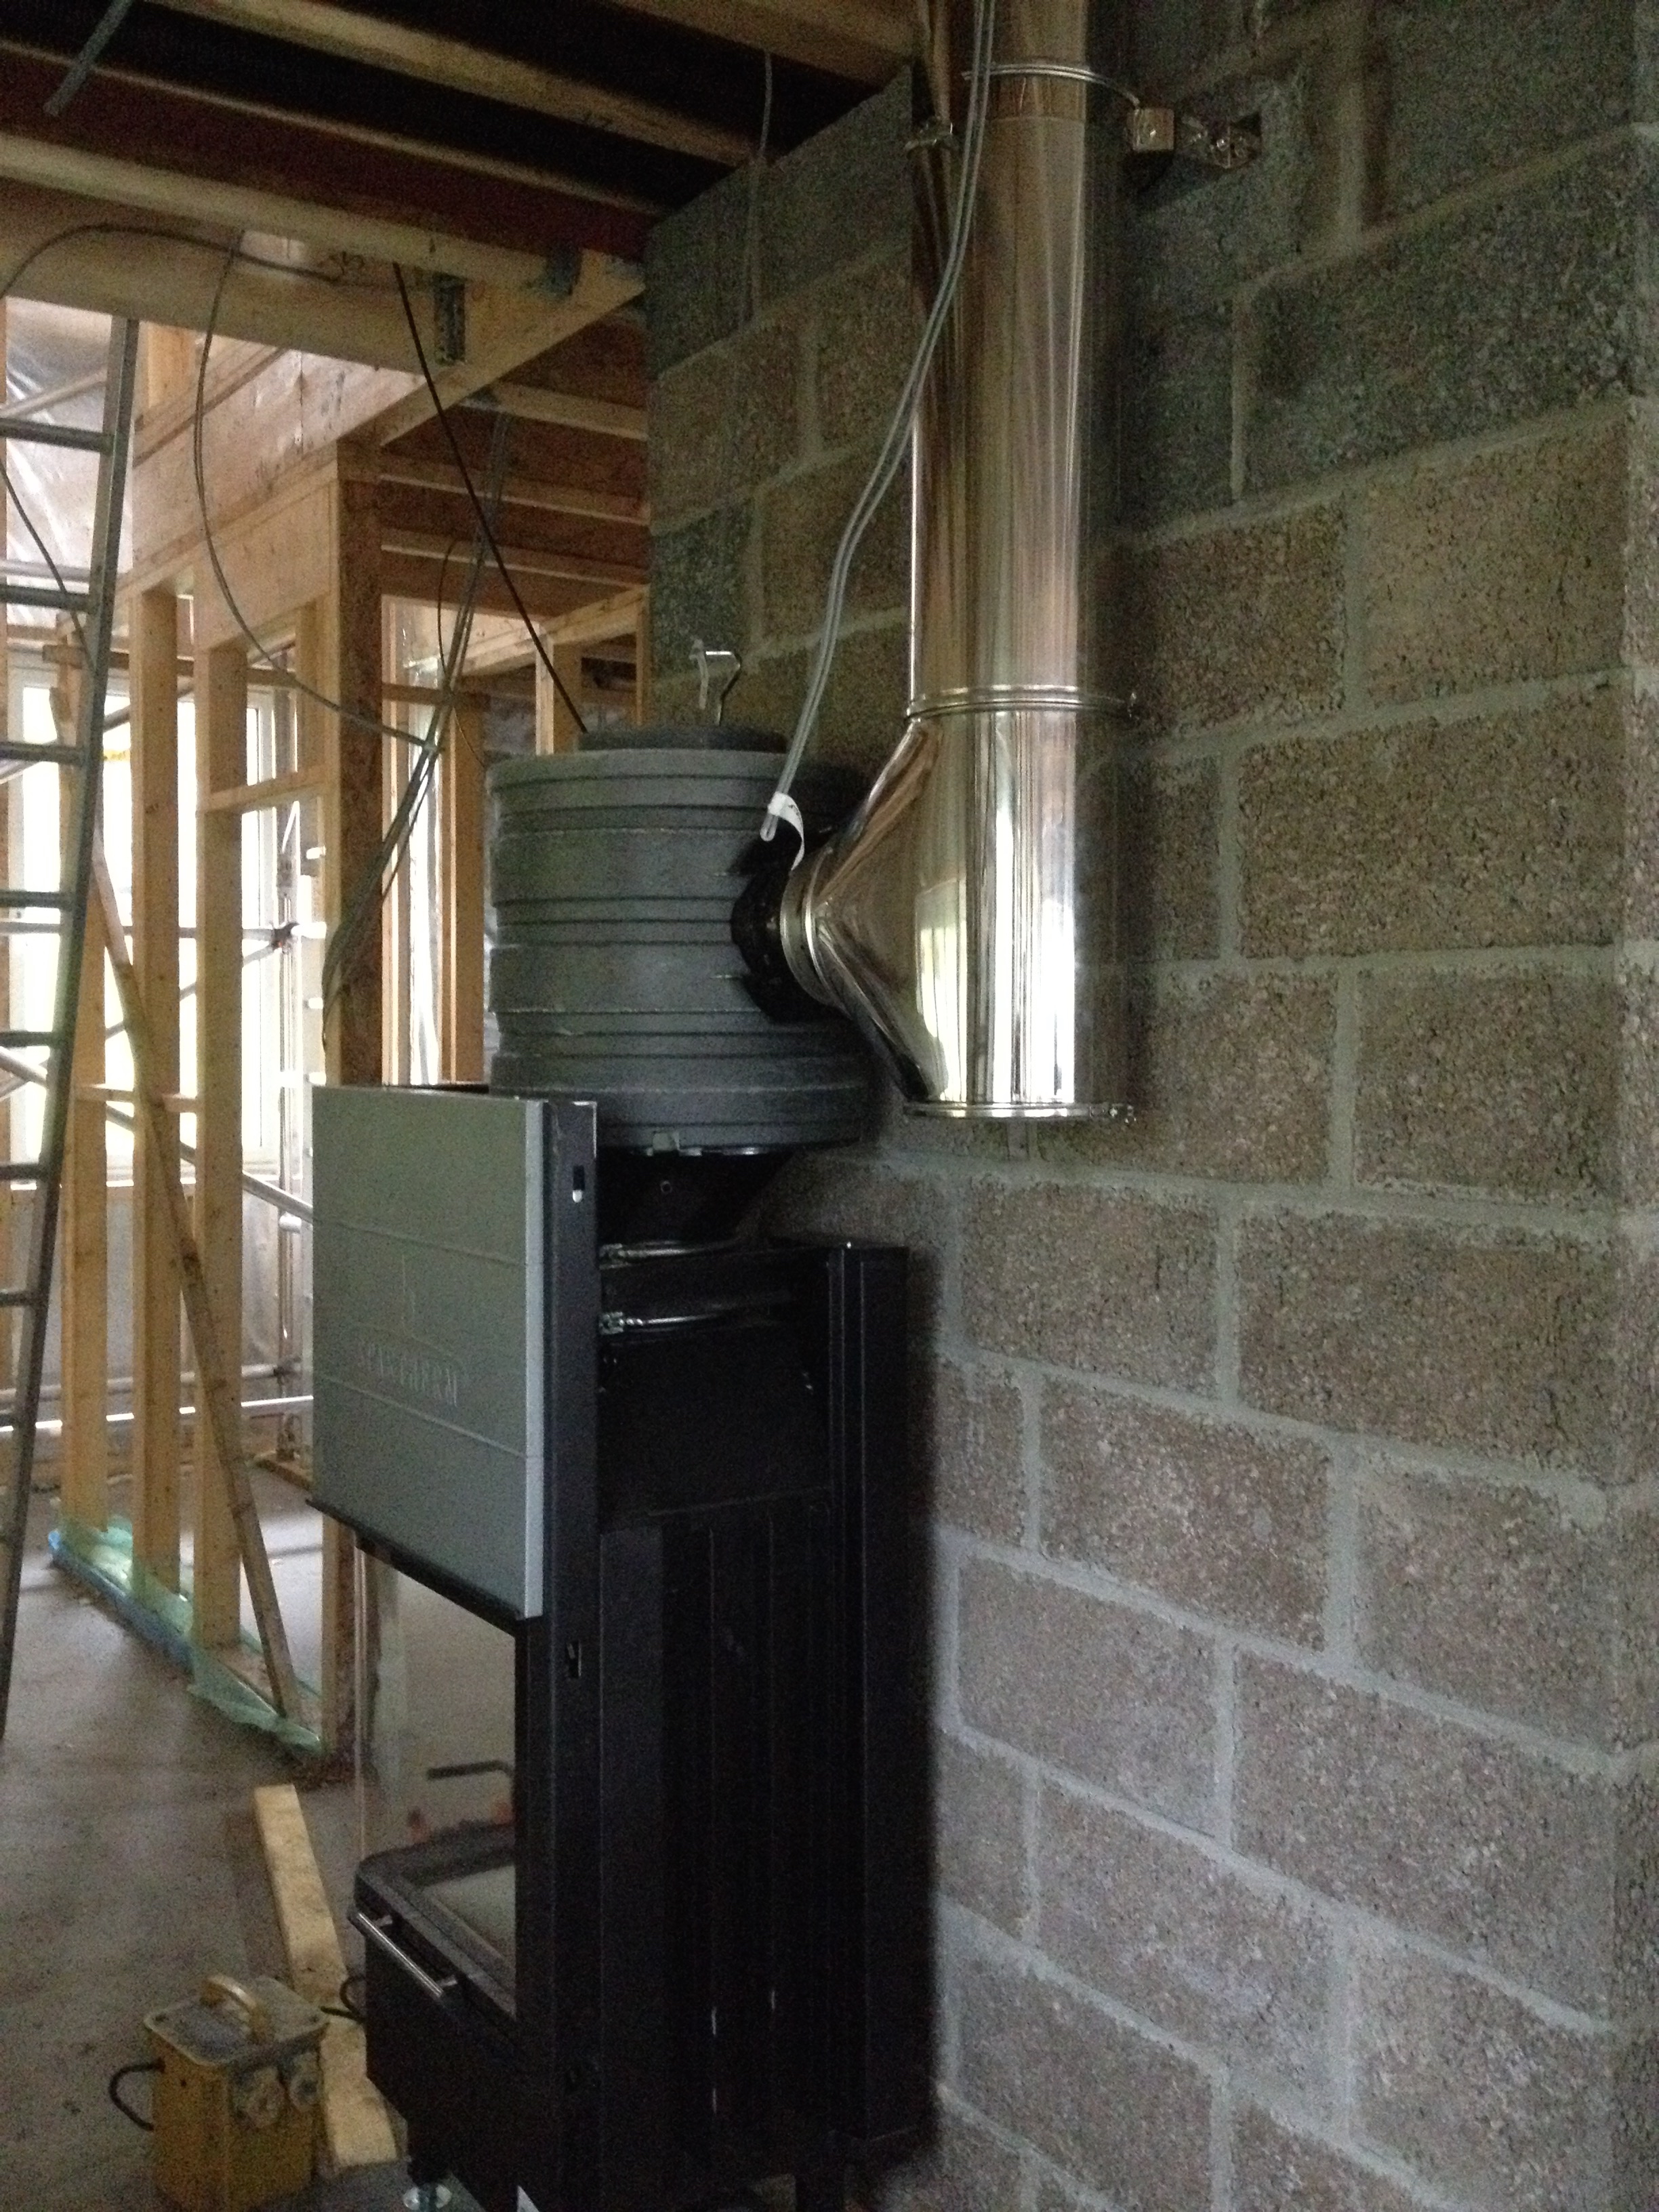
When the stove arrived it was massive. It came with two massive guys; Matt from Poland and Verek from the Czeck Republic. They were among the most efficient, practical, polite and effective people I have ever encountered. They’d solved the problem of how to get the hefty stove into the house round the piles of plasterboard on the floor in 10 seconds flat and before I’d even noticed, it was in the house.

I buzzed about them measuring and getting in the way, the amount of thought that had gone into the position of the stove was mind-bloggling so I was determined it went in the right place. The flue didn’t quite fit through the allocated space so Verek got out his angle grinder. Sparks flew.
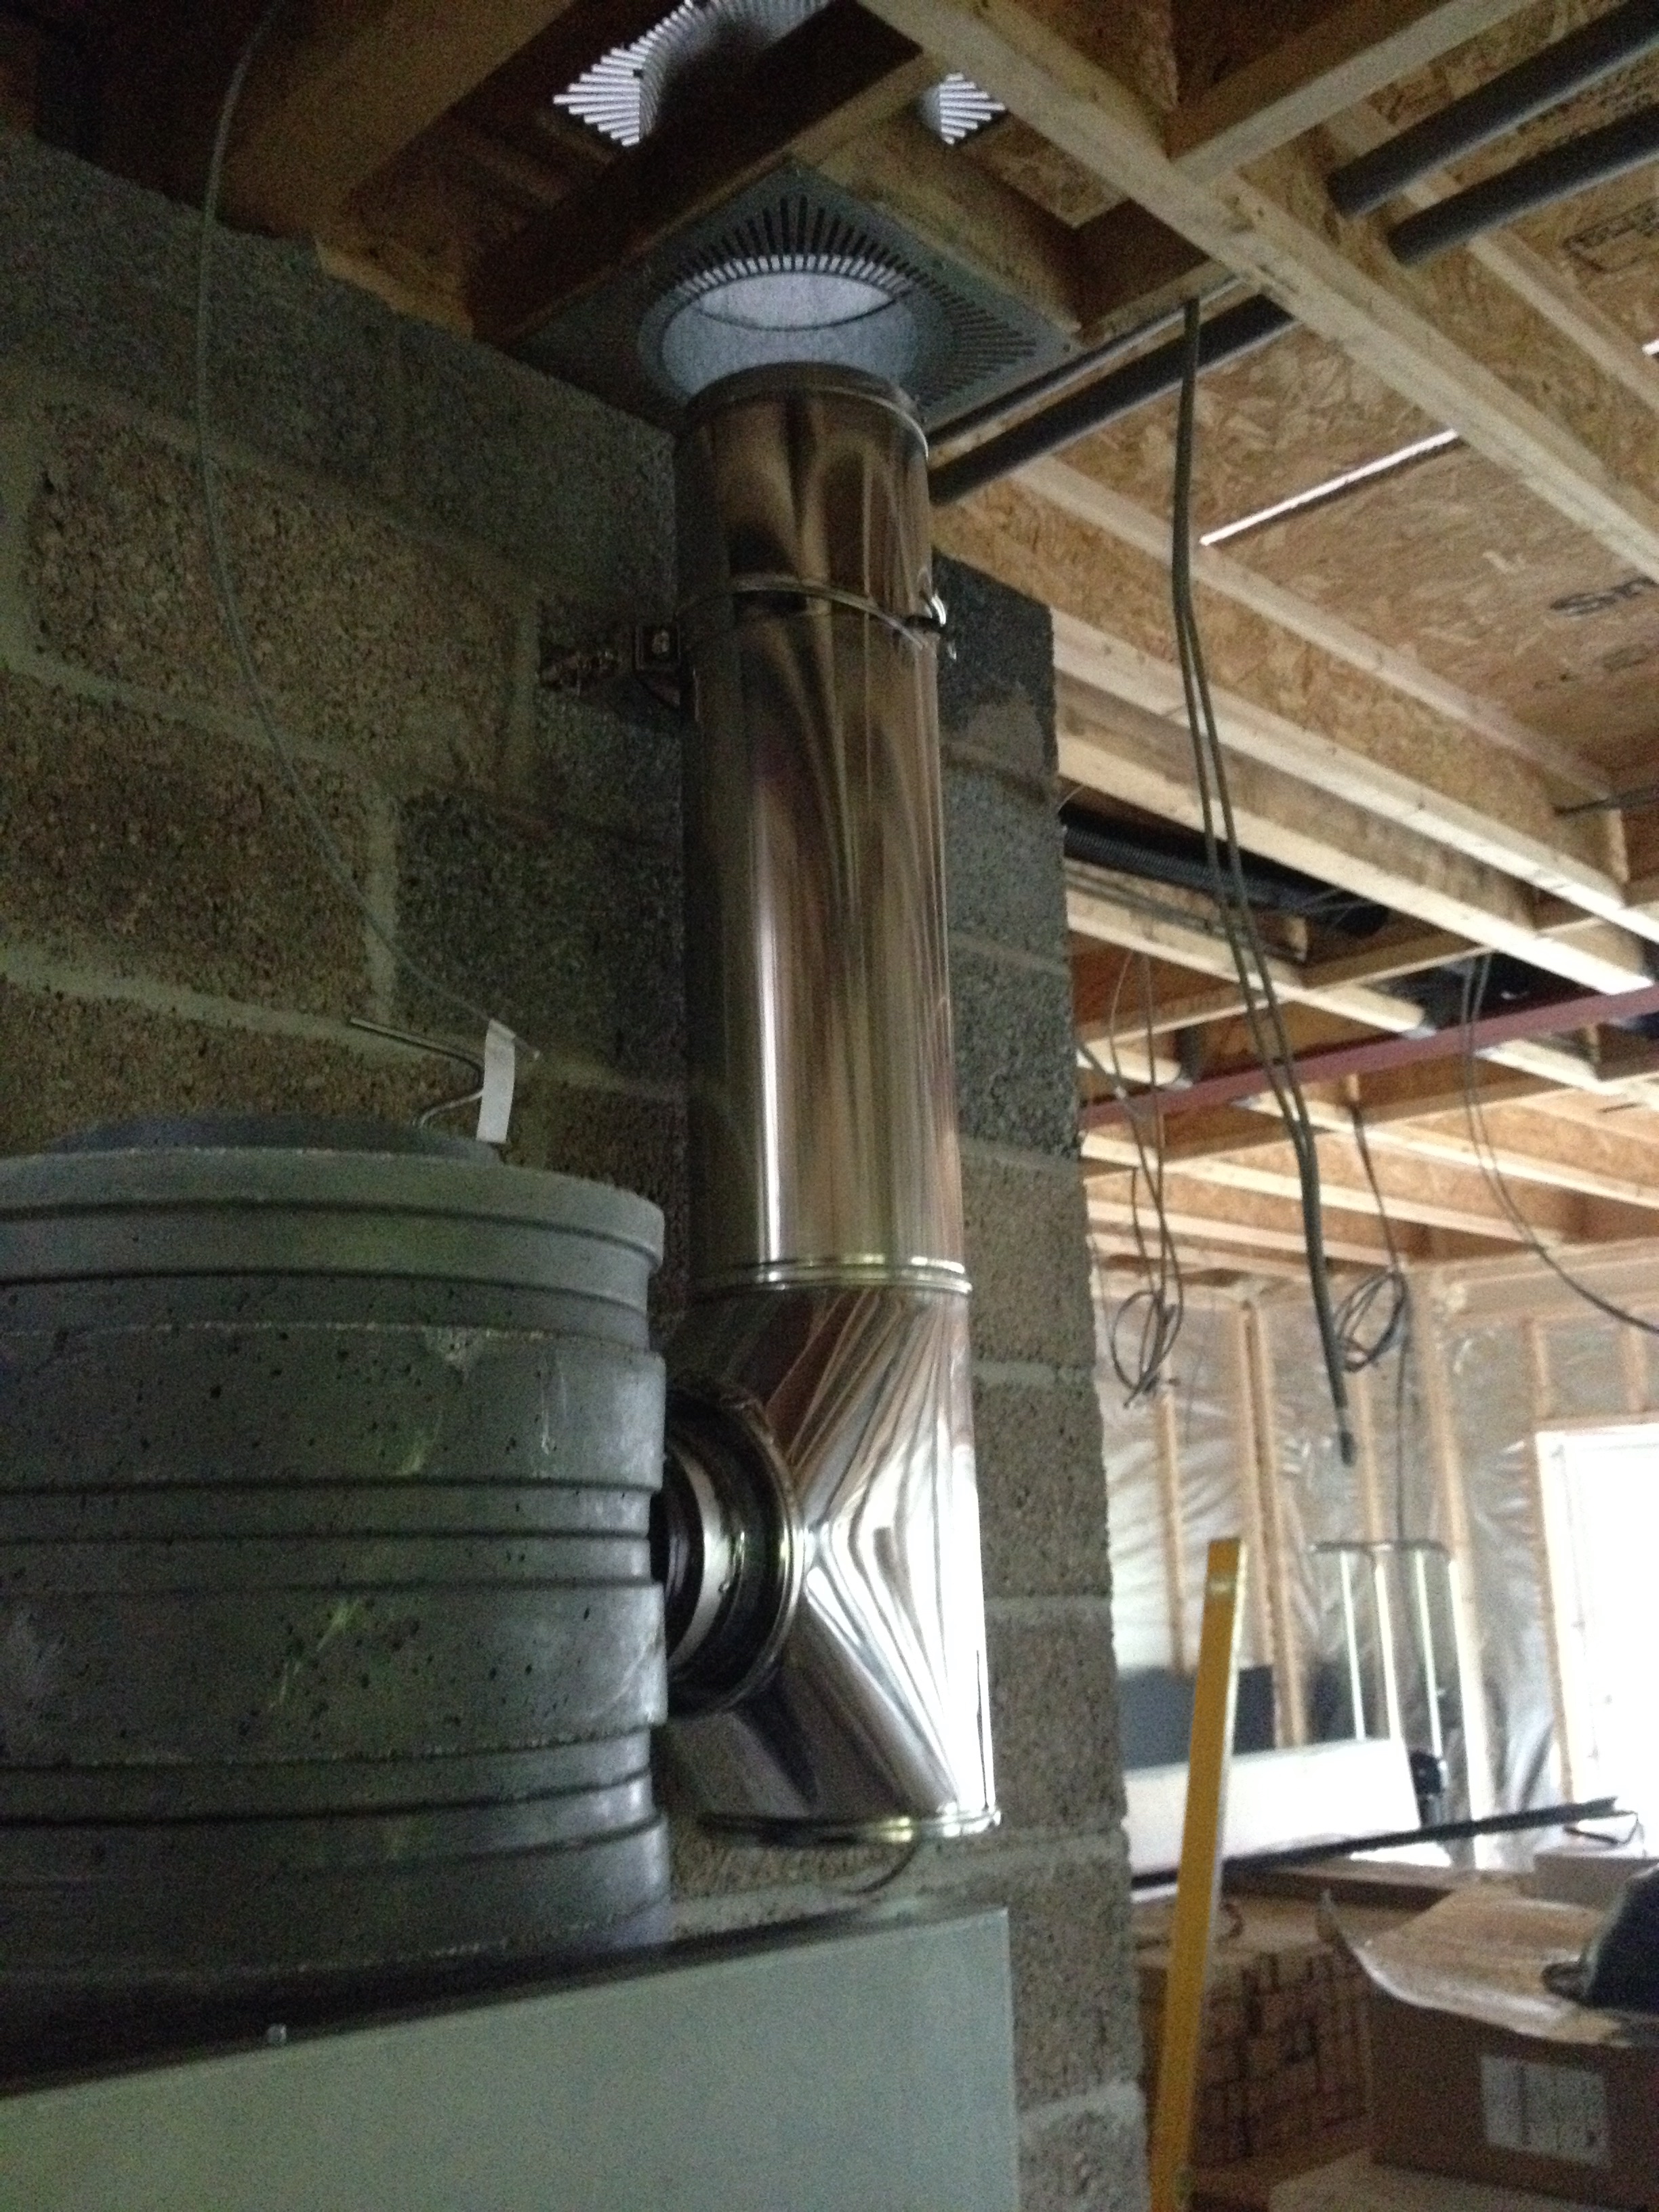
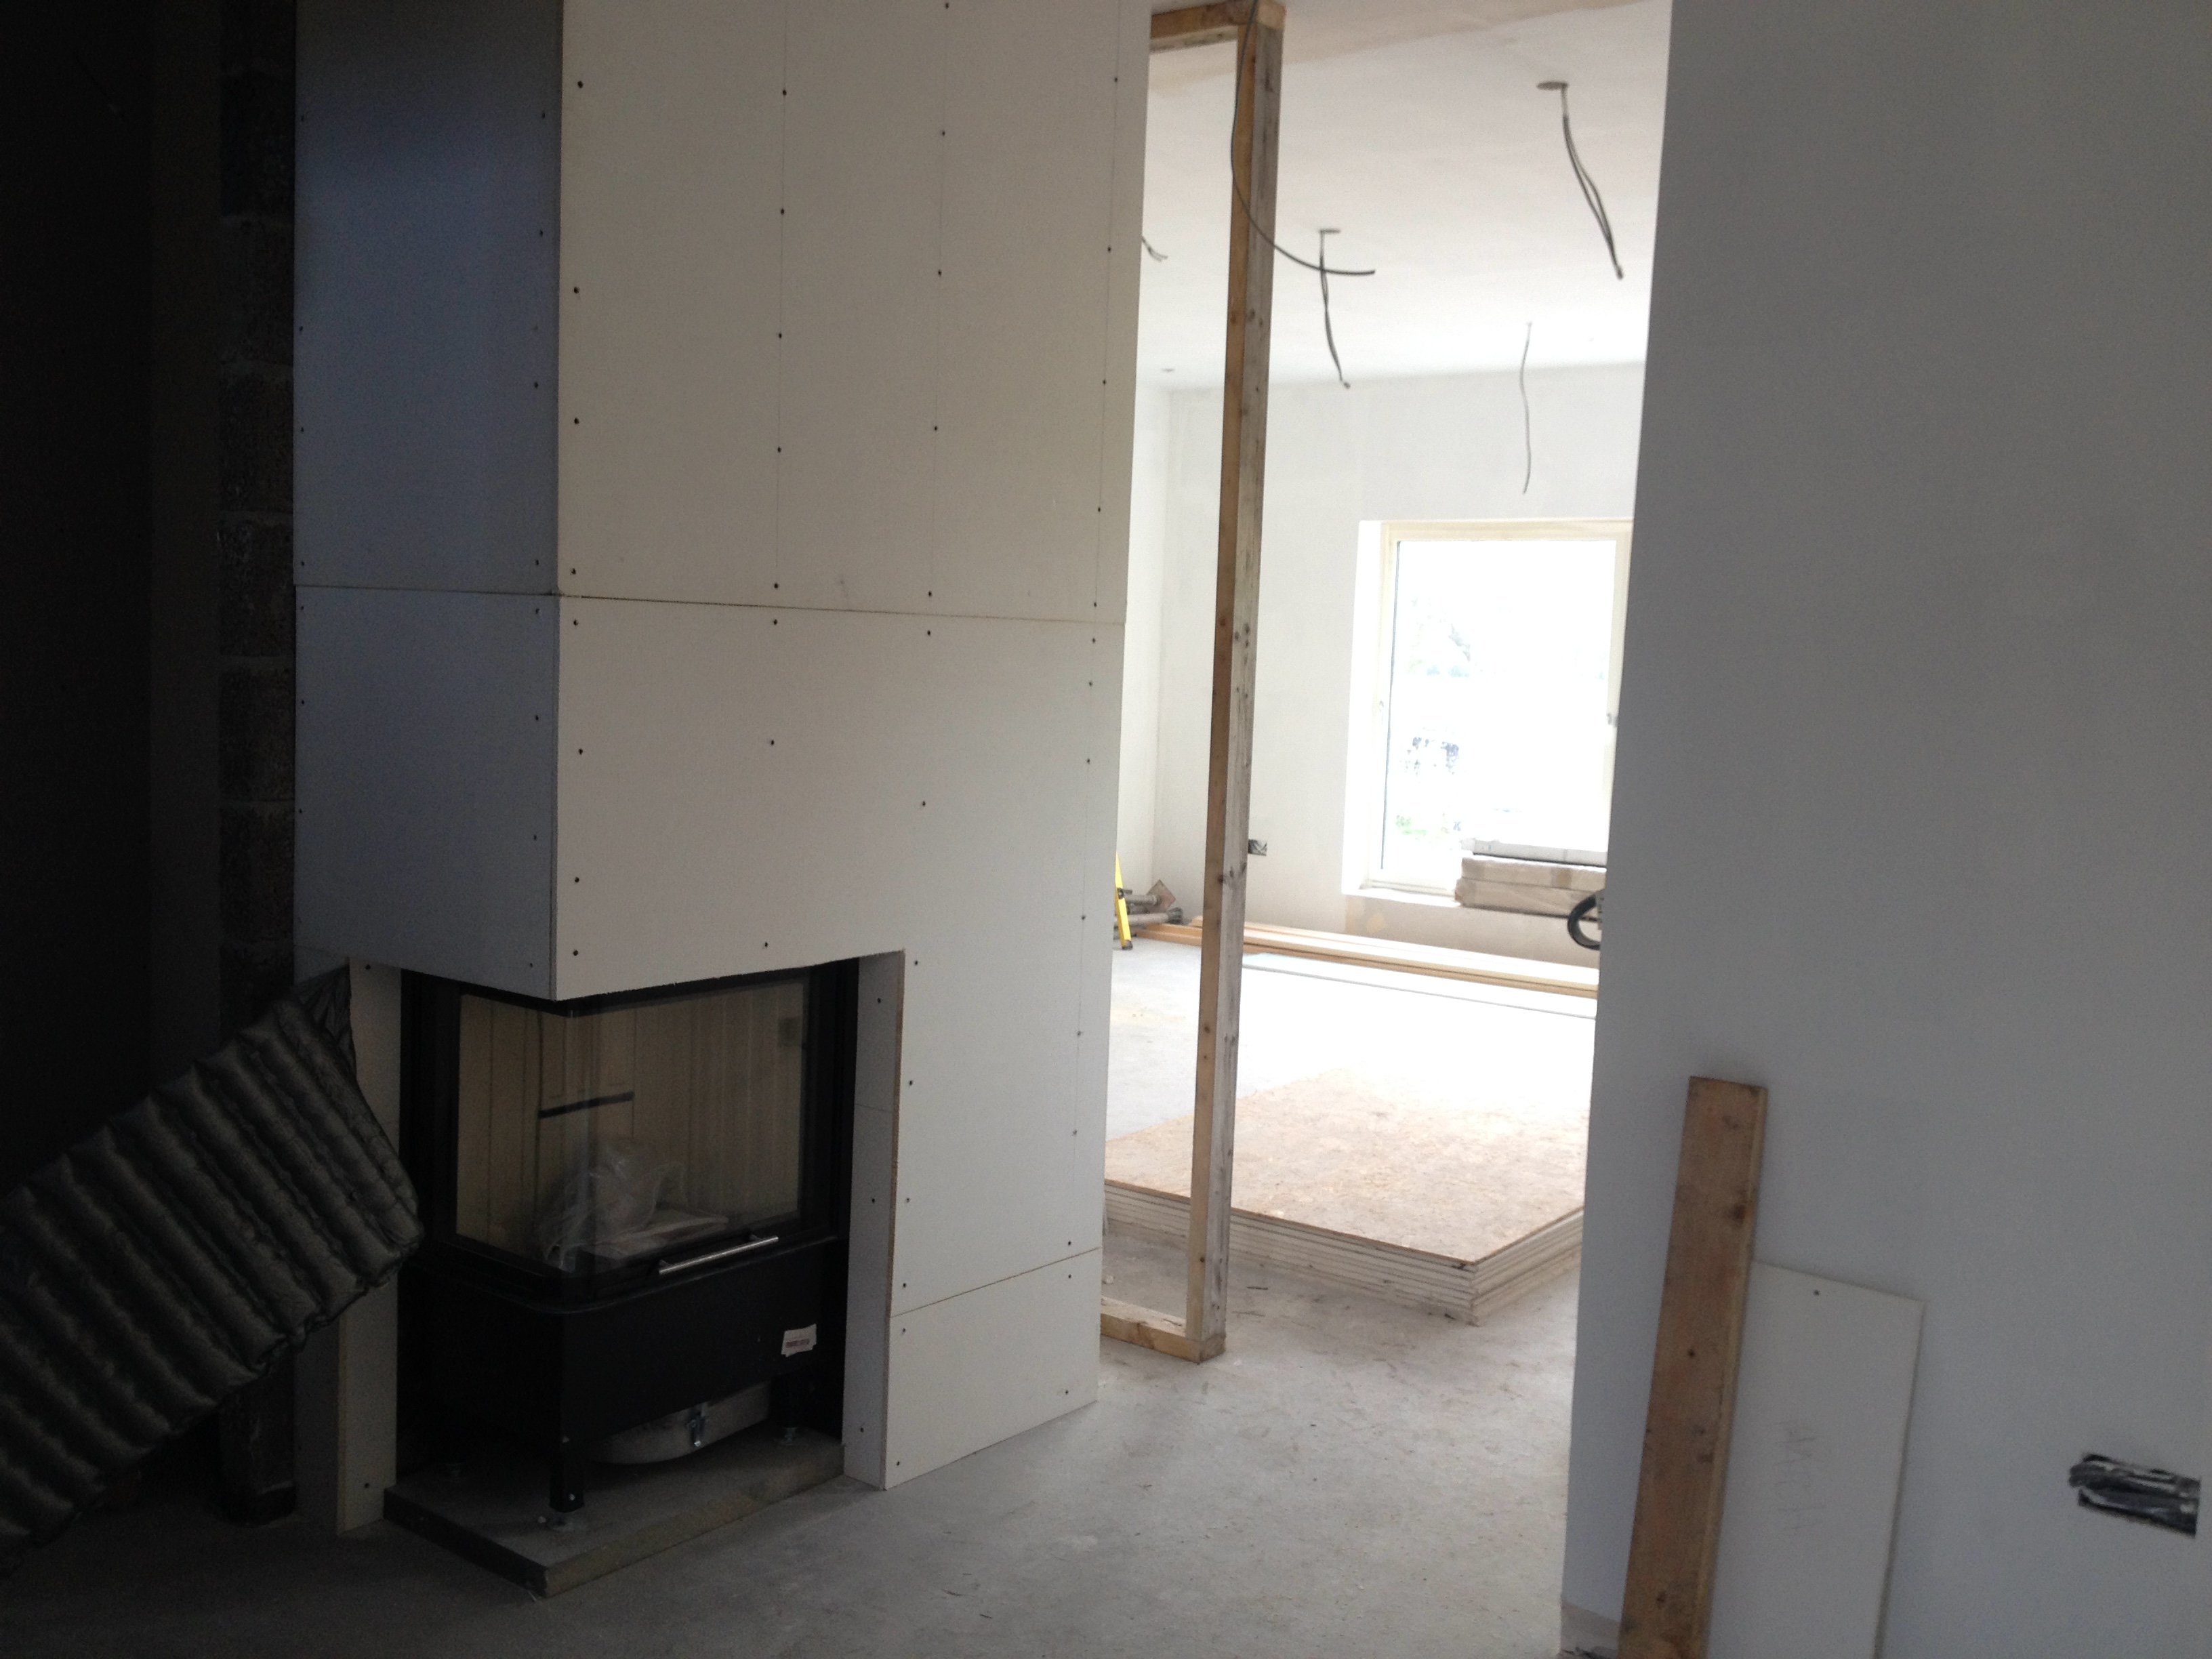
By the time I had left the flue was through the ceiling and exactly in the position allocated to it (phew!).
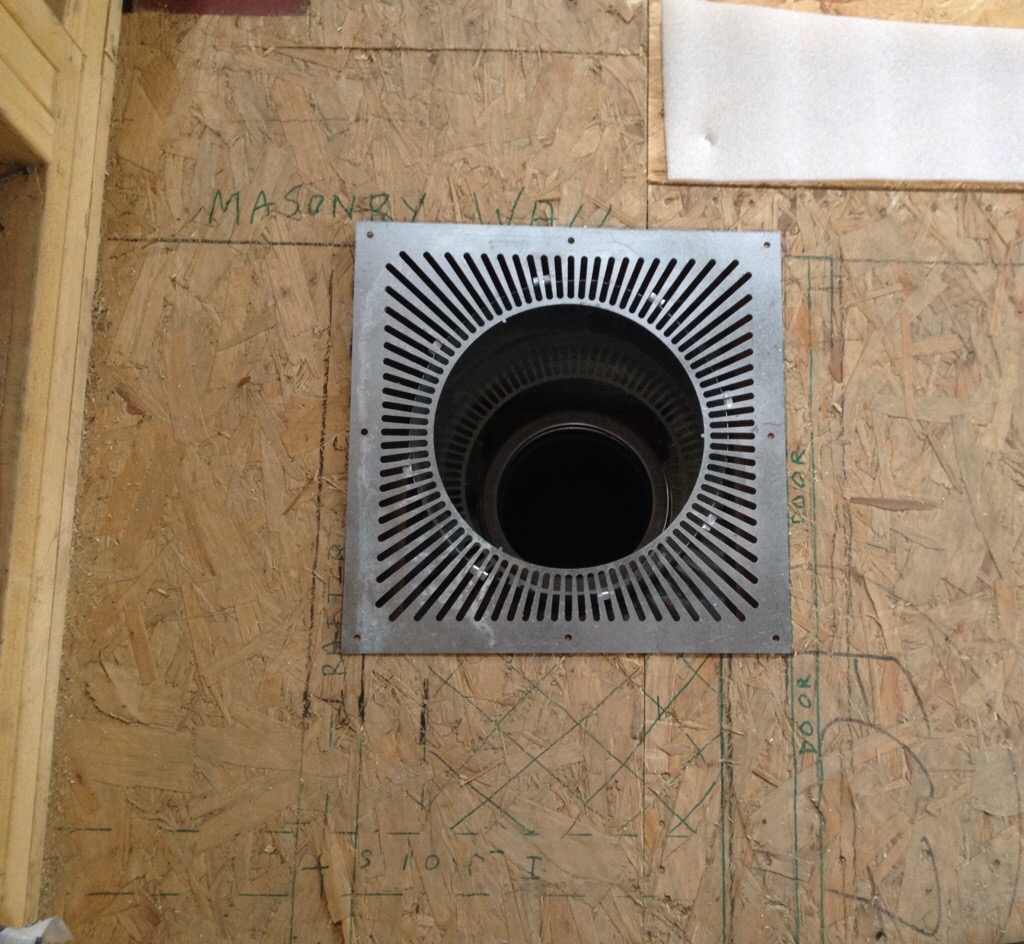
The air supply was also attached successfully, to my great relief. While we were doing the foundations the position of the air supply for the stove was a bit of an after thought. The house is very well sealed and has a Mechanical Ventilation Heat Recovery system for ventilation so the stove needs to have its own air supply. The stove burns in its own column of air, sealed from the rest of the house, coming in by pipe under the foundations and going out of the flue. It was almost the last thing that Stuart needed when making the foundations – the question of where the air supply should come out. Eventually it was decided and we sent the plan. But Stuart mistook the position of the flue for where the air supply should come out and it was something I’d been a little worried about ever since. It turned out that, for the stove chosen, this was actually a far more suitable spot for the air supply than the one we’d specified.
The installation went so smoothly and Matt and Verek were brilliant. I had emphasised the importance of sealing up the envelope of the house once the flue went in and it worked perfectly with coordinating with the slater who fitted the flashings and they sealed up all potential for air coming into the house from the outside world.
Altogether, despite the sheer torture and mind-churning preparations and planning I did for the stove, the installation turned out to be calm and smooth-running, apparently free of mishaps. My recommendation to the Kinross Stove Company? Get Matt and Verek to advise on which stoves to fit and sizes and stuff before they arrive to save people like me’s head exploding messily as they try and work it all out from building control manuals and inadequately dimensioned technical drawings.